I recently embarked on creating a static blog using SvelteKit alongside GitHub Copilot, with plans to deploy it on Netlify. While the general process seemed straightforward, I encountered several pitfalls that I wish I’d known about beforehand.
This post shares the challenges I faced and the solutions I discovered, so you can avoid the same headaches when building your own SvelteKit static site.
Why SvelteKit + Netlify + Copilot?
This combination appealed to me because:
- SvelteKit - Modern framework with excellent static site generation
- Netlify - Seamless deployment with great developer experience
- GitHub Copilot - AI assistance for faster development
- Static hosting - Fast, secure, and cost-effective
The Step-by-Step Process (What Worked)
Here’s the workflow I followed, which generally went smoothly:
1. Environment Setup
First, ensure you have the necessary tools installed:
# Install Node.js from https://nodejs.org/en/download
# This gives you both Node.js and npm

# Install SvelteKit CLI globally
$ npm i -g sv
2. Repository Creation
# Create project on GitHub first, then clone locally
$ git clone https://github.com/yourusername/your-blog.git
$ cd your-blog
3. Initialize SvelteKit Project
# Initialize SvelteKit in your existing repo
$ npx sv create my-app
4. Development Phase
Run the developement server. Work with copilot to help build out your components.
# Start the development server with hot-reloading
$ npm run dev
5. Adapter Selection
According to the SvelteKit documentation, for Netlify deployment, you need adapter-netlify:
$ npm install -D @sveltejs/adapter-netlify⚠️ PITFALL ALERT: This is where my first major issue occurred (more on this below).
6. Build Testing
# Test production build locally
$ npm run build
$ npm run preview
7. Netlify Deployment Setup
- Create Netlify account and link to GitHub
- Configure repository access permissions
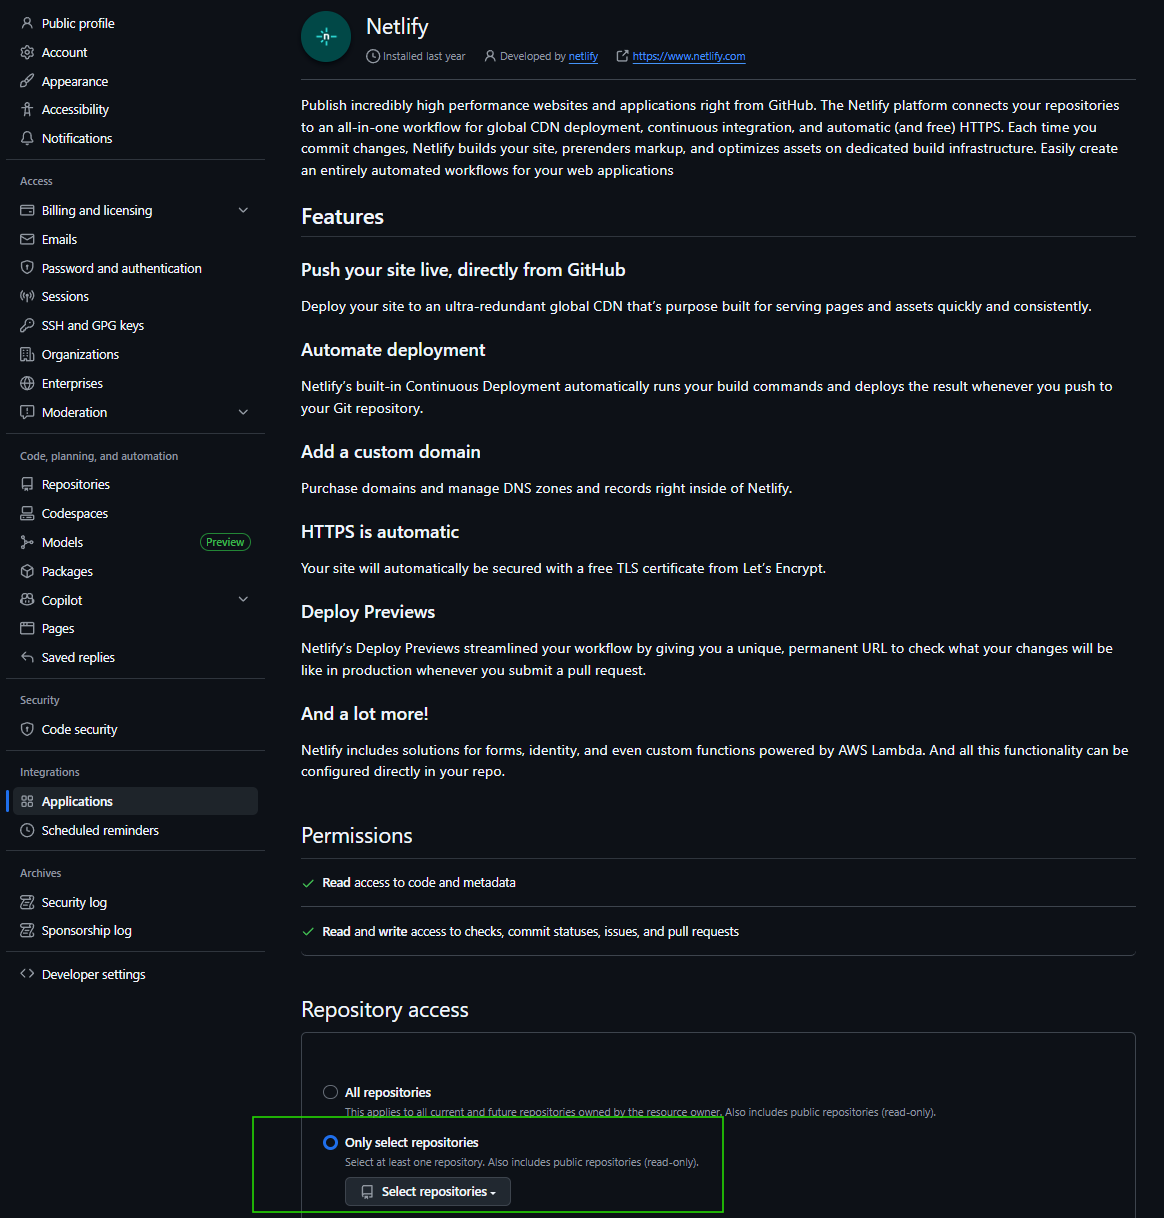
- Create new project, selecting your repository and branch
The Pitfalls I Encountered
Pitfall #1: Node.js Version Mismatch
Problem: My local development worked perfectly, but Netlify builds were failing with cryptic errors.
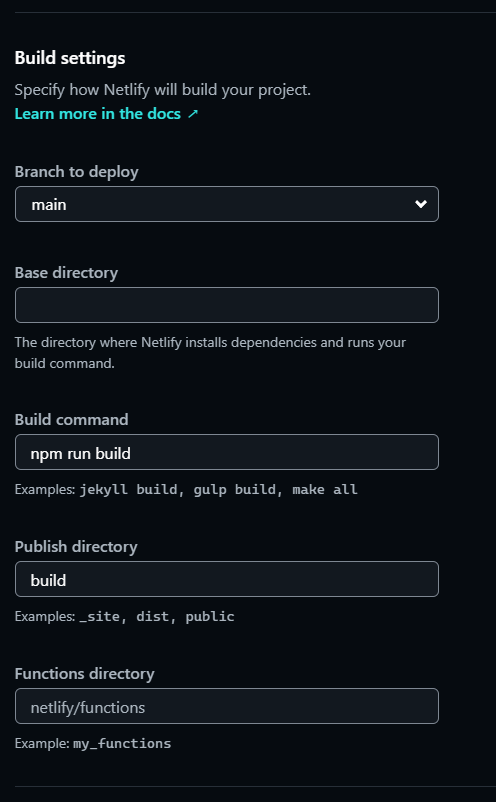
The Issue: Netlify was using an older Node.js version by default, while my local environment used Node 22.
Solution: Specify the Node version in netlify.toml:
[build]
command = "npm run build"
publish = "build"
[build.environment]
NODE_VERSION = "22" # Match your local version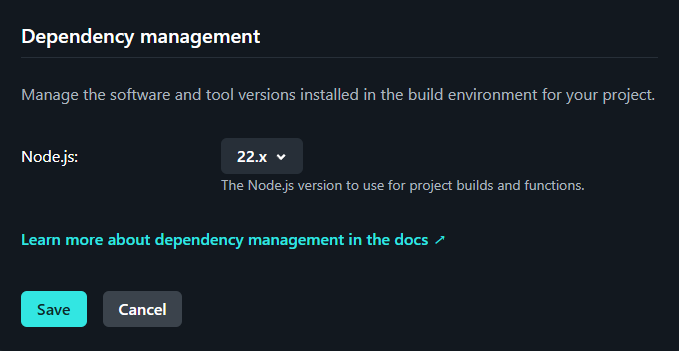 Netlify build settings showing Node.js version configuration
Pitfall #2: Adapter Configuration Confusion
Problem: Website wasn’t rendering properly after deployment. This was confusing also, because building and checking the production preview worked fine.
The Issue: I mixed up configuration options between adapter-static and adapter-netlify.
What Copilot Suggested (Incorrectly):
// svelte.config.js - WRONG configuration
adapter: adapter({
  pages: 'build',      // This is for adapter-static!
  assets: 'build',     // This is for adapter-static!
  fallback: undefined
})
Correct Configuration:
// svelte.config.js - CORRECT for Netlify
import adapter from '@sveltejs/adapter-netlify';

export default {
  kit: {
    adapter: adapter({
      edge: false,    // Use Netlify Functions (not Edge)
      split: false    // Don't split into multiple functions
    })
  }
};
Pitfall #3: Static vs Server-Side Rendering Confusion
Problem: My blog posts weren’t generating as static HTML files.
The Issue: SvelteKit defaults to server-side rendering, but I wanted static generation for a blog.
Solution: Add prerendering configuration:
// src/routes/+layout.ts
export const prerender = true;
This tells SvelteKit to generate static HTML for all pages.
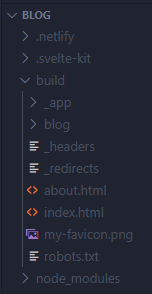 Example of static HTML files generated in the build directory
Pitfall #4: Build Directory Confusion
Problem: Copilot kept telling me I should see my static files in .netlify/static when using adapter-netlify.
 If I had a dollar for everytime copilot told a fib…
The Issue: AI will hallucinate and make up stuff. Scrutinize EVERYTHING!

Solution: Trust but Verify!
What Copilot Got Right (And Wrong)
✅ Copilot Excelled At:
- Component architecture and Svelte syntax
- CSS styling and responsive design
- TypeScript type definitions
- General SvelteKit patterns
❌ Copilot Struggled With:
- Adapter-specific configuration differences
- Deployment environment nuances
- Build pipeline troubleshooting
- Netlify-specific requirements
Lessons Learned
1. Read the Adapter Docs Carefully
Each adapter has different configuration requirements. Don’t assume they’re interchangeable.
2. Match Your Local and Production Environments
Specify Node.js versions explicitly to avoid deployment surprises.
3. Understand Static vs SSR
Know whether you want static generation or server-side rendering, and configure accordingly.
4. Test Builds Locally First
Always run npm run build && npm run preview before pushing to production. This won’t always work :(
5. AI Tools Need Verification
Copilot is incredibly helpful, but always verify configuration suggestions against official documentation.
My Current Working Configuration
Here’s what finally worked for my static blog:
// svelte.config.js
import adapter from '@sveltejs/adapter-netlify';
import { vitePreprocess } from '@sveltejs/vite-plugin-svelte';
import { mdsvex } from 'mdsvex';
import rehypeRaw from 'rehype-raw';

/** @type {import('@sveltejs/kit').Config} */
const config = {
	extensions: ['.svelte', '.md'],

	preprocess: [
		vitePreprocess(),
		mdsvex({
			extensions: ['.md'],
			rehypePlugins: [rehypeRaw]
		})
	],

	kit: {
		adapter: adapter({
			edge: false,
			split: false
		})
	}
};

export default config;
# netlify.toml
[build]
command = "npm run build"
publish = "build"
[build.environment]
NODE_VERSION = "22"// src/routes/+layout.ts
export const prerender = true;Final Thoughts
Building a static site with SvelteKit and Copilot was ultimately rewarding, but the deployment configuration pitfalls cost me several hours of debugging. The key is understanding the differences between adapters and ensuring your local and production environments match.
If you’re planning a similar project, bookmark this post and save yourself the troubleshooting headaches I went through!
Happy coding! 🚀